參考文獻:https://blog.johnsonlu.org/ubuntursync-%E5%AE%89%E8%A3%9D/
1. 安裝:
# apt-get install rsync
Reading package lists... Done
Building dependency tree
Reading state information... Done
rsync is already the newest version (3.1.3-8).
rsync set to manually installed.
The following package was automatically installed and is no longer required:
libfprint-2-tod1
Use 'sudo apt autoremove' to remove it.
0 upgraded, 0 newly installed, 0 to remove and 0 not upgraded.
2. 修改設定檔,啟用。
# vi /etc/default/rsync
RSYNC_ENABLE=true <<<default=false
RSYNC_CONFIG_FILE=/etc/rsyncd.conf
# vi /etc/init.d/rsync
RSYNC_ENBALE=true <<<default=false
RSYNC_CONFIG_FILE=/etc/rsyncd.conf
3. 修改config檔:
# vi /etc/rsyncd.conf <<<<檔名注意!!
[nasbackup]
comment = Nas Backup
path = /backup/rsync/backup
auth users = cltai
uid = cltai
gid = cltai
secrets file = /etc/rsyncd.secrets
read only = no
如果都不要設定使用者,可以把auth, uid, gid, secrets file全部#起來,就不用認證。
4. 設定帳號密碼:
# vi /etc/rsyncd.secrets
id:passwd
5. 啟動rsync:
# systemctl enable rsync
Synchronizing state of rsync.service with SysV service script with /lib/systemd/systemd-sysv-install.
Executing: /lib/systemd/systemd-sysv-install enable rsync
# systemctl start rsync
● rsync.service - fast remote file copy program daemon
Loaded: loaded (/lib/systemd/system/rsync.service; enabled; vendor preset:>
Active: active (running) since Fri 2020-12-25 16:48:17 CST; 4s ago
Docs: man:rsync(1)
man:rsyncd.conf(5)
Main PID: 15509 (rsync)
Tasks: 1 (limit: 77003)
Memory: 896.0K
CGroup: /system.slice/rsync.service
└─15509 /usr/bin/rsync --daemon --no-detach
十二 25 16:48:17 rdwks systemd[1]: Started fast remote file copy program daemon.
十二 25 16:48:17 rdwks rsyncd[15509]: rsyncd version 3.1.3 starting, listening >
啟用成功。
# netstat -na|grep 873 <<<測試ports是否正確
tcp 0 0 0.0.0.0:873 0.0.0.0:* LISTEN
tcp6 0 0 :::873 :::* LISTEN
unix 3 [ ] STREAM CONNECTED 118873 /run/user/1001/bus
unix 2 [ ] DGRAM 158734
# ufw allow rsync <<<開啟防火牆
Rules updated
Rules updated (v6)
# rsync -av /backup/rsync/ cltai@192.168.1.202:/backup/rsync/
The authenticity of host '192.168.1.202 (192.168.1.202)' can't be established.
ECDSA key fingerprint is SHA256:R1KVKeUrVTuR2ENPrbHgVQK/exqhnK6PYegX798QBkQ.
Are you sure you want to continue connecting (yes/no/[fingerprint])? yes
Warning: Permanently added '192.168.1.202' (ECDSA) to the list of known hosts.
cltai@192.168.1.202's password:
sending incremental file list
sent 54 bytes received 12 bytes 5.74 bytes/sec
total size is 0 speedup is 0.00
# chmod 777 /backup/rsync <<<要開放讀寫權,NAS才能寫過來喔。
在NAS上的設定如下:
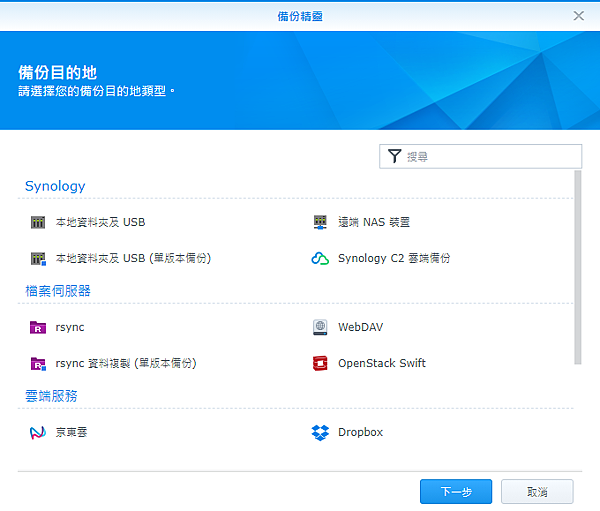
1. HyperBackup 新增資絡備份任務,在下方的+。
2. 選Rsync資料複製(單版本)

3. 帳密是Linux上的rsync帳密。

4. 跳過備份軟體,直接到最後一步設定排程。最後完成。即可自動執行。速度很快。


 留言列表
留言列表
